Coseppi Kitchen

Inclusive Vegetarian Cooking by Taylor Cook & James Seppi

Veggie Spring Rolls

These spring rolls are filled with lots of fresh vegetables and herbs.  Feel free to substitute other seasonal veggies or herbs to put your own spin on this recipe.  As always, use fresh ingredients for the best flavors!

Ingredients

  • 6 – 8 spring roll wrappers
  • 2 cups shredded cabbage (we prefer Savoy cabbage)
  • 2 medium carrots, shredded
  • 1 large cucumber, shredded or cut into matchsticks
  • 4 ounces firm tofu
  • 1 large avocado, peeled, cut in half, and thinly sliced
  • Fresh cilantro
  • Fresh mint
  • Salt
  • Peanut Dipping Sauce to accompany

Preparation

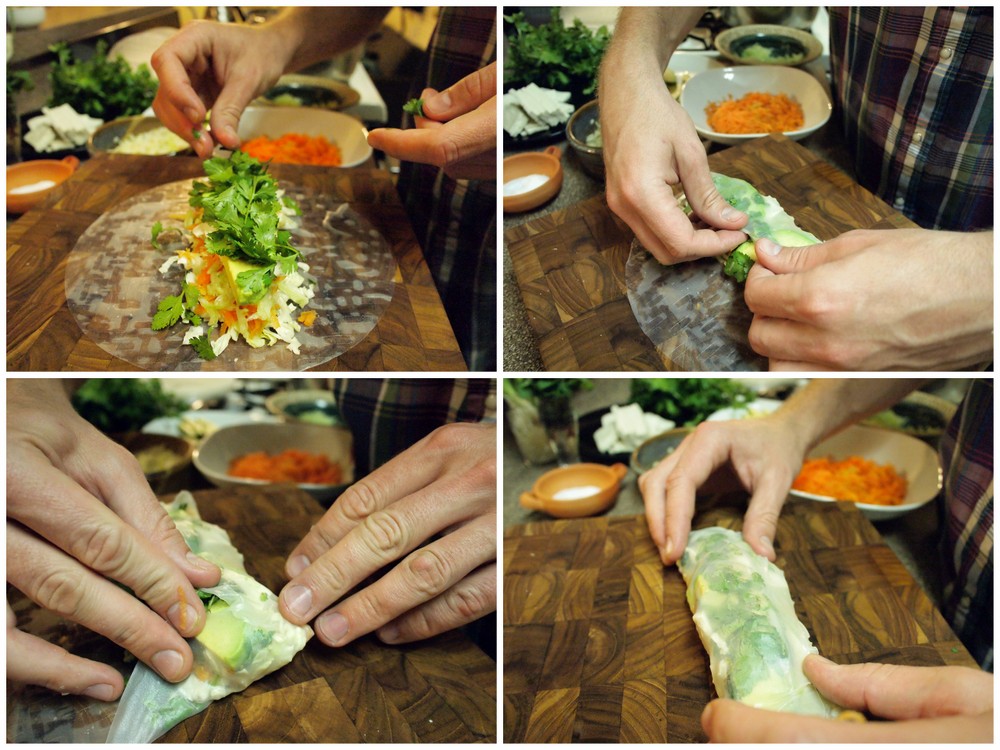
Making Spring Rolls

Making Spring Rolls

Beautiful teak cutting board courtesy Proteak at the Barton Creek Farmers Market in Austin, TX.

  1. Submerge a spring roll wrapper in warm water until it is pliable, about 20 seconds.  
  2. Lay the wrapper on a flat surface, then layer cabbage, carrots, cucumber, tofu, avocado,  cilantro leaves, and a few small pieces of mint along the center of the wrapper.  Sprinkle on a little salt if desired.
  3. Now roll it all up – Start by folding one side of the wrapper over the filling, fold the short edges over, and finally, fold the last side over the top of the whole roll (see photo for visuals on this process).  This will probably take some trial and error, so don’t give up!
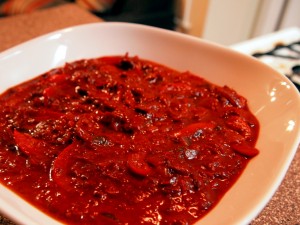
Peanut Dipping Sauce

This quick and simple sauce goes great with spring rolls, grilled tofu, or on a veggie wrap!

Peanut Dipping Sauce

Peanut Dipping Sauce

Ingredients

  • 1/4 cup natural, unsweetened peanut butter
  • 1 tablespoon light soy sauce
  • 1 spring onion, minced
  • 1 small clove garlic, minced
  • 1/2 Thai chili, minced (optional)
  • 5-6 tablespoons hot water

Preparation

  1. Combine peanut butter, soy sauce, spring onion, garlic, and chili in a small bowl. 
  2. Stir in hot water, one tablespoon at a time, until the sauce is at the desired consistency.


Old School Pisco Punch

This old school San Francisco-style Pisco Punch is sure to be a hit at your next fancy (or not so fancy) party!  To properly prepare it, you will need to give yourself at least 3 days advance notice so the ingredients can adequately meld and mingle.  This punch can be served either in a punch bowl or by the glass.  For this recipe and lots of other great classics, check out Imbibe! by David Wondrich.

Ingredients

  • 1 pineapple, peeled and cut into 1/2-inch cubes
  • 2 cups turbinado sugar
  • 2 cups water
  • 1 750-ml bottle of Pisco
  • 7 lemons

Preparation

  1. Place the pineapple chunks in a large bowl.  In a separate pot, bring the water to  boil, turn off heat, add sugar, and stir until completely dissolved.  Pour this simple syrup mixture over the pineapple chunks.  Let cool, cover, and then refrigerate for about 24 hours.
  2. The following day, use a fine mesh strainer to separate the syrup (which now will have a delicious pineapple flavor) from the sweetened pineapple chunks.  Store the pineapple chunks in an airtight container in the refrigerator
  3. In another jar or large bottle, combine the entire bottle of pisco with 1 cup of the pineapple syrup.  Store this mixture in the refrigerator for at least 2 days before using (it should last for weeks – the longer the better). Store the remaining syrup in a jar in the refrigerator (it is great for tiki drinks!).
  4. On the day you are serving the punch, you can either serve in a large punch bowl or by the glass:
    • In a Punch Bowl: Combine the pisco-syrup mixture with 16-ounces cold, filtered water, and the juice of all 7 lemons.  If desired, sweeten with more of the leftover pineapple syrup.  Add a large block of ice (see note below), and serve in small punch glasses, garnished with a few of the sweetened pineapple chunks.
    • By the Glass: Combine 2 ounces pisco-syrup mixture, 3/4 ounce filtered water, and 1 tablespoon fresh lemon juice in a shaker with several cubes of ice.  Shake vigorously, then strain into a cocktail glass. Garnish with a couple chunks of sweetened pineapple.

Note – Making a Block of Ice:  We’ve found the easiest way to make a punch bowl-sized block of ice is to use an empty milk or juice carton.  Just cut the top off, clean the inside with warm water, fill with filtered water, and freeze.  It will probably take at least 12 hours to freeze solid, so take this into consideration when planning your punch party.


Barton Creek Market Bars

V GF

Untitled Two of our favorite vendors at the Barton Creek Farmers’ Market (other than Johnson’s Backyard Garden, of course) are Dad’s Granola and Rinkon Farm’s Preserves. This recipe combines their marvelous products into one delicious recipe.

Ingredients

  • 4 cups (1 package) your favorite type of Dad’s Granola, divided
  • 1/2 cup dry unsweetened coconut
  • 2 tablespoons ground flax
  • 1/2 teaspoon salt
  • 1/2 cup egg replacer
  • 1/4 cup turbinado sugar
  • 1/4 cup vegetable oil
  • 1/2 cup unsweetened almond milk
  • 1/4 cup garbanzo flour
  • 1 jar (11 ounces) of your favorite Rinkon Flume Creek Preserves
  • 1/2 cup chopped pecans

Preparation

  1. Combine 3 cups granola, coconut, flax, salt, egg replacer, sugar, oil, almond milk, and flour in a large bowl. 
  2. Transfer the granola mixture to a greased rectangular baking sheet and press into an even layer.
  3. Spread the jam evenly over the layer of granola. Sprinkle the remaining 1 cup of granola evenly over the jam and spray lightly with a vegetable oil-based cooking spray.
  4. Bake at 350 degrees Fahrenheit for 30 minutes.
  5. Cut granola squares with a sharp knife and allow to cool before serving.

Homemade Ginger Beer

If you enjoy strong, spicy, full-flavored ginger ale or beer, then this recipe is for you!  Making your own ginger beer is actually pretty easy and doesn’t really require any special equipment other than an old 2-liter bottle or growler.  If you don’t know where to get dry ale yeast, try searching for a local homebrew store (such as Austin Homebrew Supply).

Homemade Ginger Beer

Homemade Ginger Beer

Ingredients

  • 3/4 lb fresh ginger root (use less for a less pungent end product)
  • 2 quarts water
  • 1 cup turbinado sugar (white can also be used)
  • 1 lemon
  • 1/8 teaspoon dry ale yeast (such as Danstar Nottingham) *

Preparation

  1. Give the ginger root a good wash and cut off any funky-looking skin (you can leave it mostly unpeeled).  Then cut the ginger root into rounds, about 1/8-inch thick.  Place the pieces into a large heat-resistant glass (such as Pyrex) bowl, and crush slightly using the back of a wooden spoon or a cocktail muddler.  This helps express some of the juice and aids in flavor extraction.
  2. Heat the water to boiling, then pour it over the ginger in the bowl.  Add the sugar, stirring to dissolve.
  3. Use a citrus zester or Microplane to zest the entire lemon, being careful to avoid the white pith.  Juice the now-naked lemon and add 2 tablespoons of the juice to the mixture, stirring to incorporate.
  4. Let the mixture cool to room temperature (this usually takes around 1 hour), then sprinkle the yeast over the surface.
  5. Cover the bowl with a clean cloth or paper towel and let sit out for 24 hours.  After a few hours you should see some yeasty activity (slight bubbling) in your bowl.
  6. After 24 hours are up, carefully strain the ginger beer into a clean 2-liter bottle or 1/2-gallon growler.  Screw on the lid tightly and let sit out for 12 – 24 hours longer.  During this time, the yeast will continue to reproduce, carbonating the ginger beer.
    CAUTION: DO NOT LET SIT OUT FOR LONGER THAN 24 HOURS.
  7. After this period of 24 hours, move the sealed bottle to your refrigerator, let chill, then enjoy straight or in a cocktail of your choice (I suggest a Dark and Stormy).  When you open the bottle for the first time, do it over a sink because there is a good chance it might bubble over.
    The ginger beer will keep in refrigerator for a long time, but you might want to open the lid every day or two to let off excess carbonation.

* For bonus points, make your own “ginger bug” and use some of it instead of dry yeast!

Ginger beer base

Ginger beer base


A Week in Old Mexico

For the short break between Christmas and New Year’s, we took a quick trip down to Mexico.  We decided that because of its proximity and wealth of cool historical sites and legendary food, Mexico would be perfect for quick jaunts mandated by short work holidays.  On this, our first such trip, Taylor and I tackled (well, barely scratched the surface of) Guanajuato and Mexico City.

Taylor above Guanajuato

We had a great time checking out the sites, including lots of churches, mummies, some haunted houses (very popular for some reason), museums, and Aztec temples. We of course also had a lot of fun with the the food culture, though sometimes it was a challenge to find good vegetarian options.  In Guanajuato, however, Enchiladas Mineras, which are typically vegetarian, are a local specialty dish. Also, if you were ever doubting it, we learned that enchiladas are definitely an “anytime food” – breakfast, lunch, dinner, snack, or whenever!

Getting some roasted chayote on the boat in Xochimilco

We’d like to give a shout-out to Carmen, the proprietor of Hogar de Carmelita Hostel.  Aside from being a friendly, gracious host, Carmelita and her staff were also fantastic cooks, preparing delicious vegetarian breakfasts for us each morning.  Here are our versions of our favorite Mexican breakfast dishes: MolletesEnchiladas, and Chilaquiles.

Market Fruit Stand

And who can forget the classic tradition of making that slightly off-tasting Mexican beer taste by adding some lime and hot sauce – micheladas! We, uh, “sampled” them several times a day while there, and were impressed by the variety of preparations.  Basically, as long as you have lime and beer, you have a chelada, or add some hot sauce and you have michelada.  Our michelada recipe is based off of one we had before we went for very fun boat ride in Xochimilco, but don’t be afraid to be creative when you make your own!

We cannot wait to go back to Mexico again.  There is a whole lot more for us to check out! Click the picture below to see all the pictures from our trip:

Coseppi Trip to Guanajuato and Mexico City

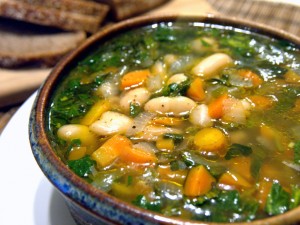
Celeriac White Bean Soup

V GF

Mirepoix is the aromatic flavor trinity of celery, carrot, and onion used as a base in typical French cuisine.

This simple bean soup replaces common celery with the stalks and leaves of its more pungent cousin, celeriac (often called celery root) in the mirepoix. If you are in Austin, Johnson’s Backyard Garden recently started selling this delicious herb at farmers’ markets around town.

Celeriac White Bean Soup

Celeriac White Bean Soup

Ingredients

  • 1 cup diced celeriac stalks and leaves
  • 1 cup diced carrots
  • 1 medium white onion, diced
  • 1 large clove garlic, minced
  • 2 tablespoons olive oil
  • 2 bay leaves
  • 2 cups vegetable broth
  • 2 cups water
  • 1 cup cooked cannellini beans
  • 2 tablespoons fresh lemon juice
  • Salt and black pepper to taste

Preparation

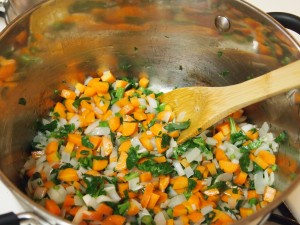
  1. Saute celeriac, carrots, onion, and garlic in olive oil until the onion is translucent and the carrots are tooth-tender, about 5 minutes.
  2. Add the bay leaves, broth, and water, and bring to boil.  Reduce heat to low and simmer partially covered for 10-15 minutes.
  3. Add the white beans and continue to simmer a few minutes until the beans are warmed.
  4. Add the lemon juice, season with salt to taste, and give a few good twists of freshly ground black pepper.
Sauteeing the Celeriac Mirepoix

Sauteeing the Celeriac Mirepoix


Farm-City, State Documentary

We want to give a quick plug to our friend David Barrow and his crew who are currently making a documentary called Farm-City, State.

This film will ponder the question “What if an entire city [namely, Austin] could feed itself?”.  Here’s a little information about the documentary from their site (www.farmcitystate.com):

The film will follow protagonist Brenton Johnson, of Johnson’s Backyard Garden, who has grown from 1/4 of an acre to over 200 acres in the past 6 years to help feed the city of Austin. Starting a new non-profit, FarmShare Austin, to feed the ‘food deserts’ of Austin, Brenton will show how organic food is not only for the wealthy. The film will include other urban farmers, politicians, local food non-profits, locally-sourcing restaurants, and large grocery stories.

The film has already involved Brenton Johnson, Dorsey Barger, Glenn and Paula Foore, TX Representative Eddie Rodriguez, Judith McGreary, Ty Wolosin of Windy Hill Organics, Natural Grocers, Central Market, Whole Foods, Chef Sonya Coté, FarmShare board members, Carla Crownover, SXSW Eco and we will be interviewing many, many more including chefs, public figures and more farmers!

Farm-City, State will explore the social, political, and economical state of local food in Austin, Texas. A family will also endeavor into a 30 day local diet with help from local farmers, local chefs and other community members to further explore the economic impact of this lifestyle.

We encourage all our readers to either donate to Farm-City, State‘s fundraising campaign, or just to share the project with your friends: http://www.indiegogo.com/farmcitystatedoc/x/1716740.  After talking with David and watching the film’s teasers, Taylor and I are definitely excited for the finished product!


Red Sauce for Enchiladas

V GF

This red sauce is made mainly from dried Mexican guajillo chili peppers, which have an amazingly rich flavor, especially when fried a little.  Also, this sauce isn’t just for enchiladas – it also goes great as a dipping sauce for tortilla chips or as a table condiment for your next Mexican meal.

Red Sauce for Enchiladas

Red Sauce for Enchiladas

Ingredients

  • 8 large dried guajillo chilis
  • 2 dried chipotle peppers
  • 2 tablespoons vegetable oil
  • 3/4 cup vegetable broth
  • 1/2 large white onion, diced
  • 1 large red bell pepper, cut into thin strips
  • 2 cloves garlic, minced
  • 2 medium red tomatoes, diced (2-3 canned whole tomatoes can be substituted)
  • 1/2 tablespoon Mexican oregano

Preparation

  1. Boil dried guajillo and chipotle peppers in a pot of water until softened, about 10 minutes.
  2. Drain the water and, when the peppers are cool enough to handle, remove the steams.
    Tip: If you are making broth from Better-than-Bouillon or a cube, reserve some of the pepper water for the broth!
  3. Heat 2 tablespoons of oil in a large skillet. Fry the softened peppers for a minute on each side on high heat until fragrant. Remove from heat.  Leave the leftover oil in the skillet and remove the skillet from heat.
  4. Transfer peppers to a blender. Add the broth and puree until smooth.
  5. Reheat oil in the skillet and saute bell pepper, onion, garlic, tomatoes, and oregano until the peppers are soft, about 10 minutes. Add the pepper puree and continue cooking for another minute or two.  Season with salt to taste and serve!

Note: If desired, you can blend the sauce again for a completely smooth sauce, but I like it with the strips of pepper and diced onions.


Making Norwegian Rosettes for the Holidays

Growing up, a family friend of my Norwegian grandfather would always bring over an assortment of Norwegian Christmas cookies each year for the holidays.  He would of course share this bounty of sweets with his children and grandchildren, and I was always delighted for these special once-a-year cookies. Sadly, that family friend passed away several years ago, and both my grandfather and I have moved away from the town we lived in in Maryland, so it has been a long time since he or I have enjoyed, or even seen, those Scandinavian treats.  Moreover, I didn’t even know the names of any of the cookies!

Well, wouldn’t you know it, but Edible Austin, the Central Texas food magazine, has on the cover of its current issue a magnificent photograph of one of the Norwegian cookies I remember best, and it turns out they are called Rosettes!  Inside is a great recipe for them (with spicy Mexican chocolate!) by Jessica Maher of Lenoir.  I read that you need a specialized tool, called a rosette iron, to make these cookies, so I promptly ordered one from Amazon.  Intimidated slightly by the prospect of deep frying, Taylor and I mustered our courage and made our first batch of rosettes this past Sunday – and they turned out great!  They are light, crunchy, and just-sweet-enough, just like I remember them.

Norwegian Rosettes - Just like I remember them!

Norwegian Rosettes – Just like I remember them!


The traditional recipe has both eggs and milk, so Taylor got work devising an inclusive vegan version.  We made those last night, and they turned out spectacular! I’m sure even my grandfather wouldn’t be able to tell that they are not made with animal products!  In fact, I’ll be mailing him some of these for Christmas this year (don’t tell him – it’s a surprise!).  I know he hasn’t had them since his friend passed away, so I’m confident that they will put a big smile on his face.

Even though we aren’t likely to see any of the real white stuff  this year in Austin, these beautiful snowflake-shaped holiday cookies will leave you dreaming of the snow-peaked mountains of Scandinavia, and they’re sure to put a smile on the faces of all you share them with.  Be sure to check out our Vegan Rosettes recipe and make yourself some of these wonderful cookies!


« Previous PageNext Page »


© Copyright 2012 Coseppi Kitchen and Coseppi Partnership (Taylor Cook and James Seppi). All Rights Reserved.